How to enable my Webcam on Microsoft Teams
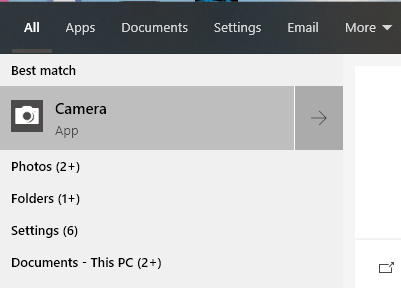
- Check if the device you are using currently has a webcam installed. If you are not sure, open the Start menu and type “Camera“.
- Open the Windows Camera App.
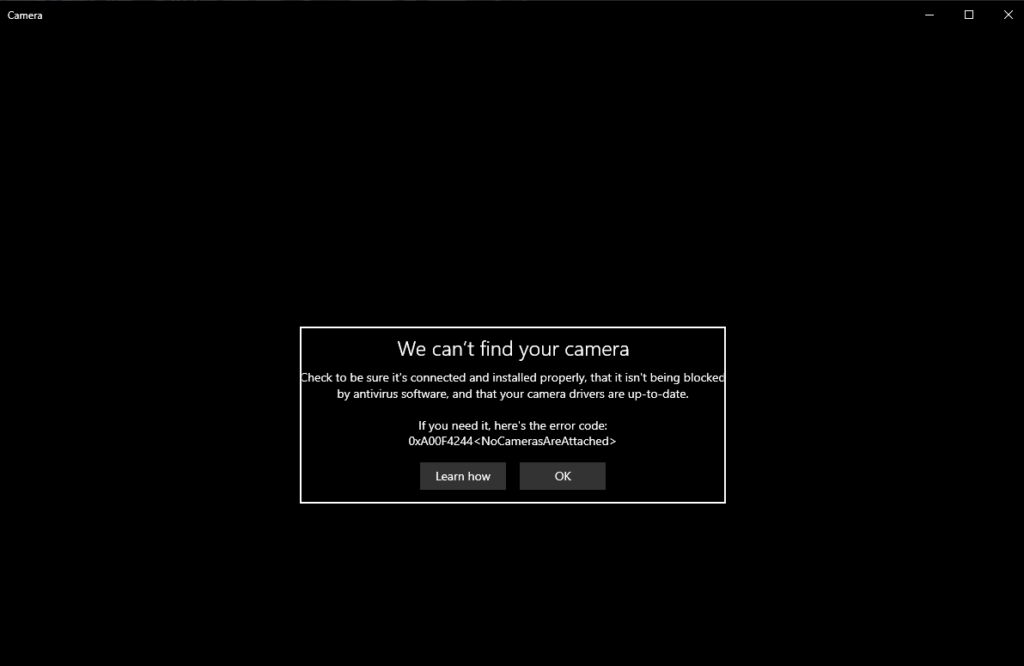
- If this message appears, either you do not have a webcam, or the webcam is broken/not installed properly. Check all connections/wires to the webcam and your computer.
(NOTE: Only ONE application can use the Webcam at a time, so MAKE SURE YOU CLOSE THE WINDOWS CAMERA APPLICATION BEFORE USING MICROSOFT TEAMS.) - (Optional) If you DO NOT have a webcam, you can always download the Microsoft Teams Mobile App to use your cell phone as a webcam and microphone. To download and install the Microsoft Teams Mobile App, feel free to click here to follow our joining a Teams Meeting without a webcam or microphone guide.
- Once you are sure you have a webcam, join or create your Microsoft Teams Meeting, and you will be prompted with the following screen:

- If the Webcam Slider is set to on like the picture above, your webcam is properly configured for Microsoft Teams.
- To turn off your webcam during your Microsoft Teams Meeting, select the Webcam Icon. A slash through this icon means your webcam is off.

Category: How-To, Issues and Solutions, Microsoft Teams Tags: