Create a group in Outlook Web App
- Sign in to Office 365
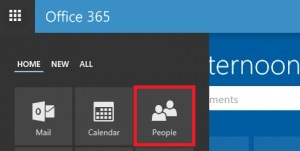
- Next, select the app launcher icon
 .
.
- After, choose People.
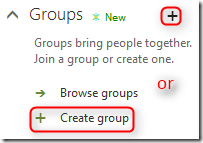
- Next to Groups, select the Add button or click create group.
- Then, Choose a name, enter a group name that briefly captures the spirit of the group.
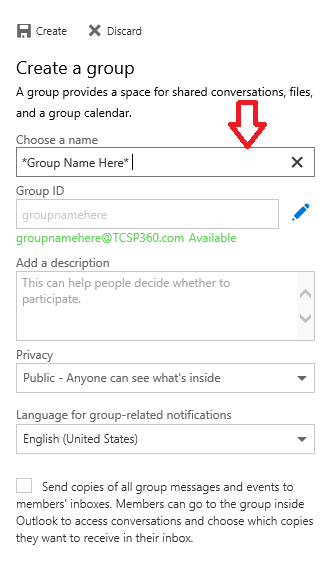
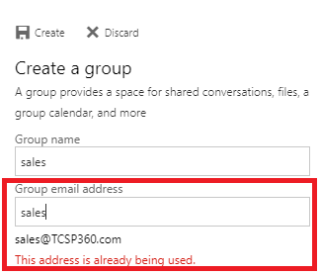
- To assign an abbreviated name to your group which will be part of the group URL, in the Group ID box click Edit
 .
.
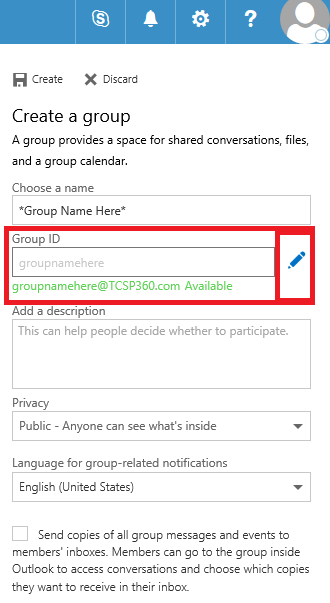
- However, if you see “this address is already being used”, try something different. Note that once you choose a group ID, it cannot be changed.
- Then, Add a description, enter a detailed description of the group to help others understand its purpose. This description will be included in the welcome email when others join the group.

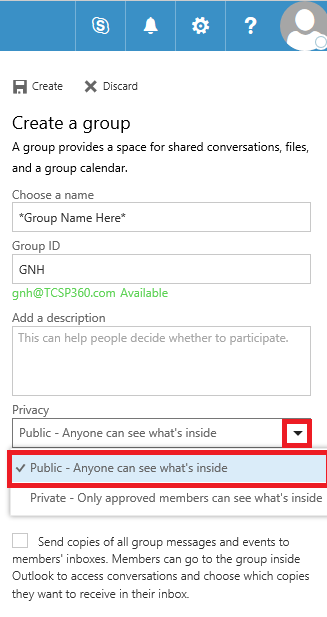
- In Privacy, do one of the following:
- To create a group in which anyone within your organization can view its content and become a member, choose Public.
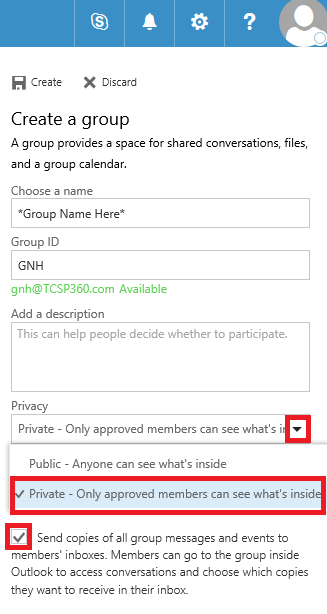
- Or you can select Private to create a group in which membership requires approval by a group owner and only members can view group content. Select box next to “send copies“so subscribers can receive an email and calendar event notifications in both their group inbox and personal inbox.
- To create a group in which anyone within your organization can view its content and become a member, choose Public.
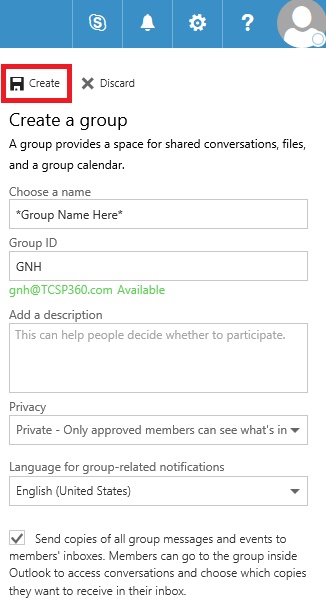
- Last, click Create.
Category: Outlook (Web App) Tags: